WebLogic 12.1.2 Domain Reconfiguration – I
In this post you will learn basic WebLogic domain upgrade processes for WebLogic 12c(12.1.2) version and migration processes.
- Install last JRockit or JDK-7
- Install WebLogic 12.1.2
- Backup old WebLogic domain folder with its AdminServer and managed servers
- Move the old domain folder to weblogic 12.1.2 domains folder. The reconfiguration wizard updates the domain on selected folder, will not create a new weblogic 12.1.2 domain folder.
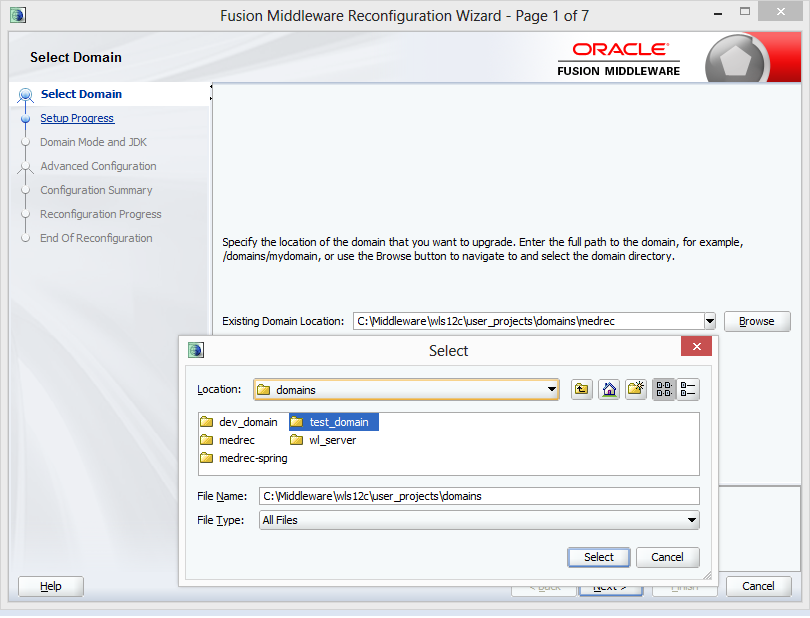
- Start reconfig.sh or reconfig.cmd
Windows: ORACLE_HOME\oracle_common\common\bin
UNIX: ORACLE_HOME/oracle_common/common/bin
6. Select the old domain which moved to under WebLogic 12c domains folder.
In this step configuration wizard, updates the files and folders, and reconfigures WLS Infrastructure successfully.
Before:
  <name>test_domain</name>
  <domain-version><strong>10.3.6.0</strong></domain-version>
  <security-configuration>
After:
  <name>test_domain</name>
  <domain-version><strong>12.1.2.0.0</strong></domain-version>
  <security-configuration>
7. Select domain mode and Java Version: I chose other JDK which I preferred Oracle-JRockit.

8. Update current datasources. If you are going to upgrade the database or move it this feature will be helpful, otherwise, this feature is useless. Select “Don’t convert”
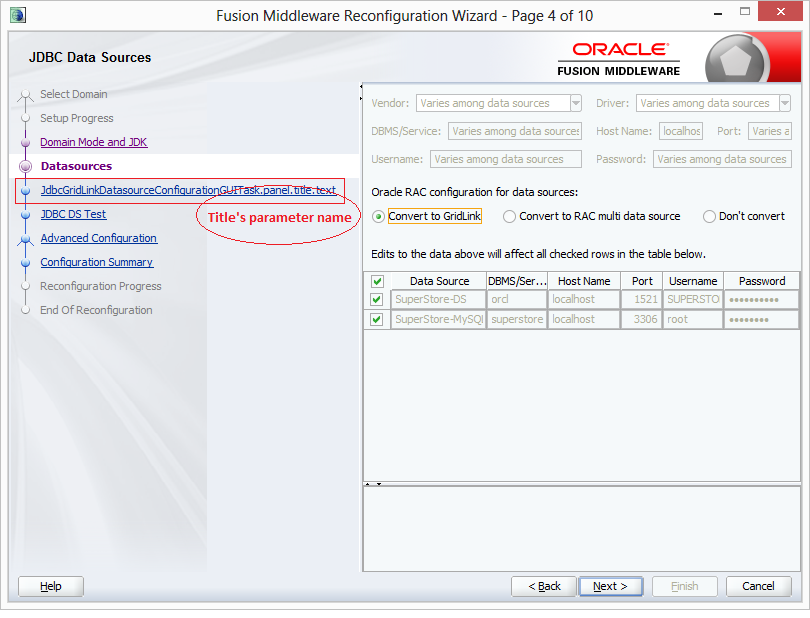
On the datasources screen, if you select “Convert to Gridlink” or “Convert to RAC multi datasource” option, the wizard will add one more screen for the next step.
I realized when you select “Convert to Gridlink” option, there is a minor non-functional bug which is the label name for this step’s screen on the left. I reported this to Oracle WebLogic team. Nothing serious, just this screen is not mostly used, and I thought this screen not tested properly.
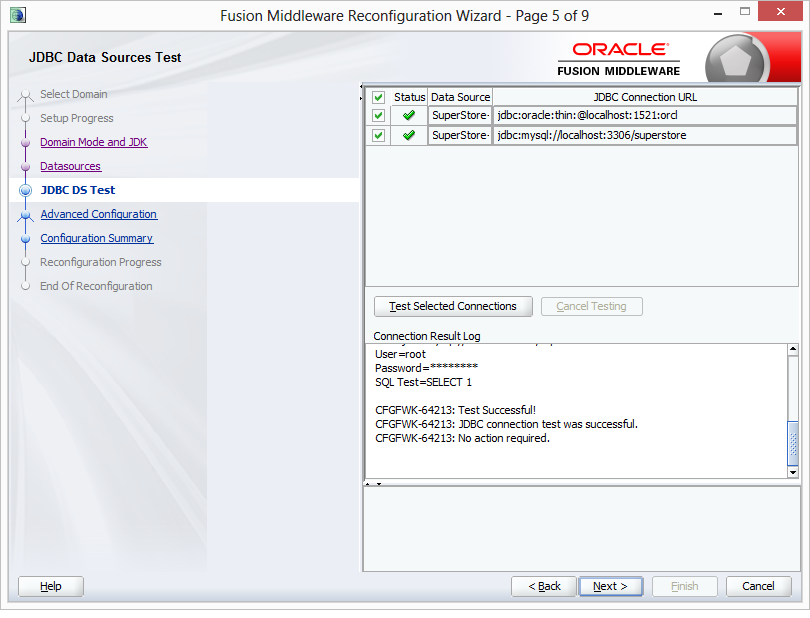
9. Test JDBC datasources: For my test domain, I have developed an application which uses and connects two databases, one is MySQL and the other one is Oracle.
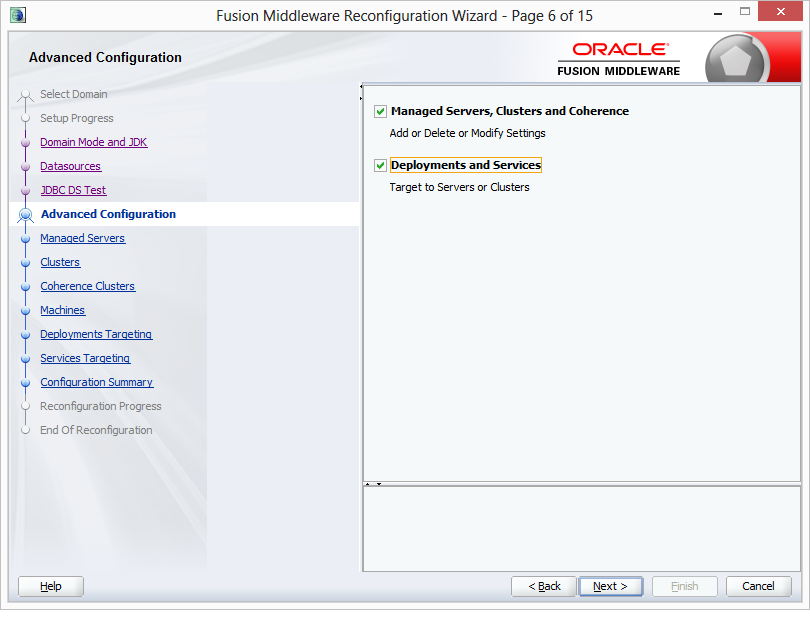
10. Advanced Configuration: In this step, choose “Managed Servers, Clusters and Coherence” and “Deployment Services” options. It’s better to select these options for the upgrade process. These means we will see 6 additional reconfiguration wizard screens.
11. Managed Servers: In this step you can list managed servers and its current listen addresses and ports. You can add, further managed servers in this screen.
Note: Do not use “Add” button, always prefer clone button for your current managed servers.

IMPORTANT NOTE: In this screen, I have got null pointer exception and could not move on to the next step, just click on cancel and start from the beginning. REMEMBER delete the current folder, and copy it from the original again.
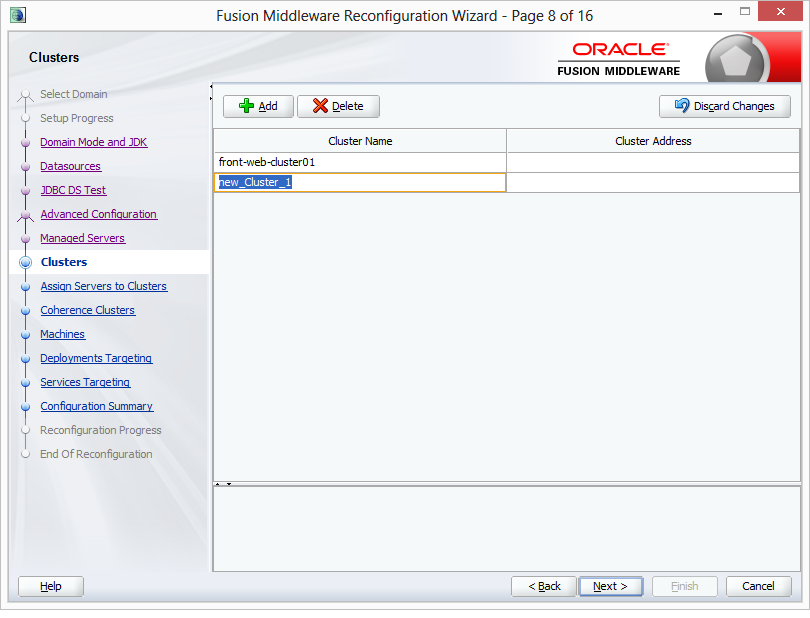
12. Clusters: In this step, you can configure your current cluster and add new cluster. If you don’t have any cluster just skip this step by clicking next.
13. Assign servers to clusters: In this step, assign managed servers to the clusters.
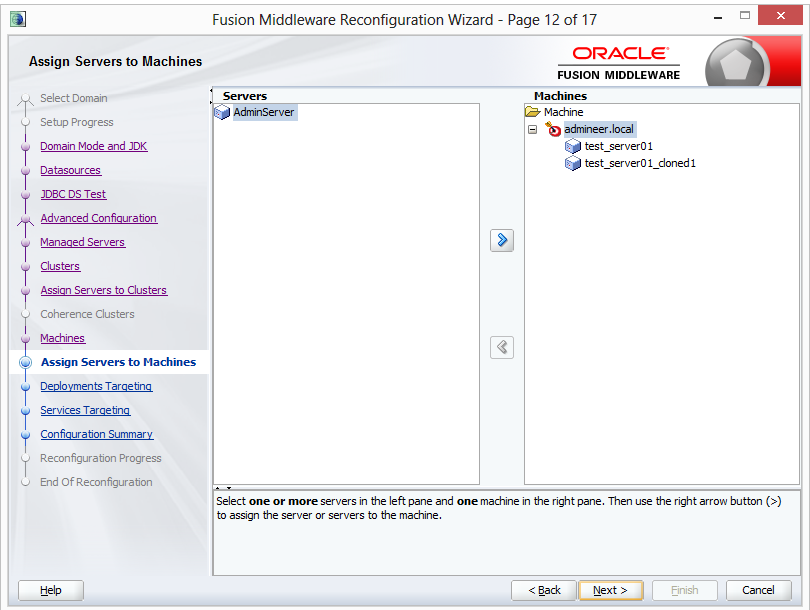
14. Assing servers to Machines: In the managed server screen I have cloned one more managed server and assigned this under my admineer.local machine.
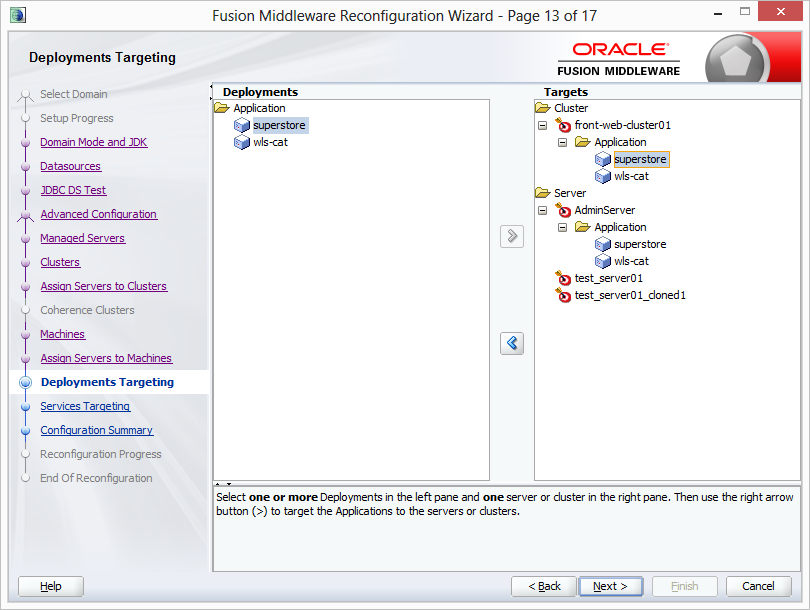
15. Deployments targeting: Deployments must be targeted to the new managed servers or clusters.
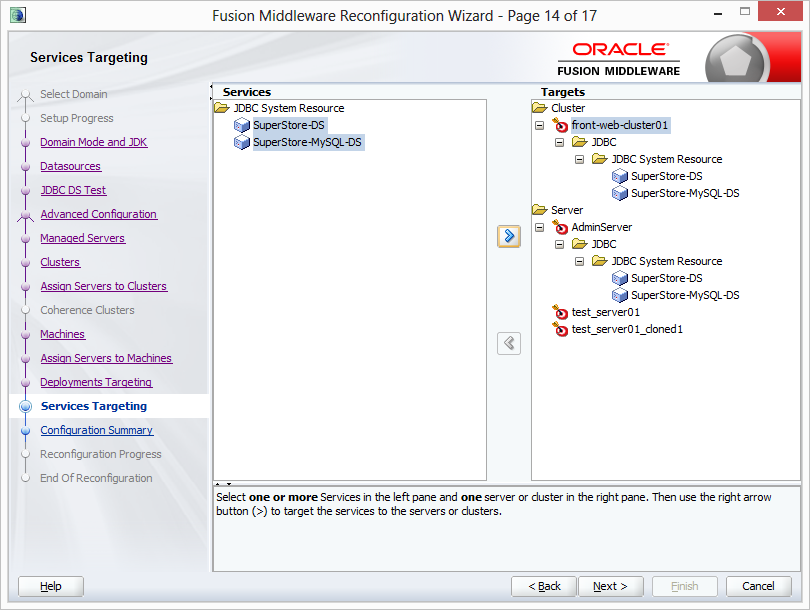
16. Service Targeting: The JDBC and other services must be edited and reconfigured in this step. I have two datasource and reconfigured again according to my new WebLogic 12.1.2 domain.
17. Configuration Summary: In this last step, the reconfiguration settings are finished. Just summarize the settings again, and if something is wrong go back (remember you can directly reach the relevant screen by clicking on text on the left) and fix them.

NOTE: At the reconfiguration progress, you can see warning like this: “CFGFWK-40318: Invalid or missing JDBC datasource connection parameters”. If you tested your datasource and got successful result, just ignore this warning.
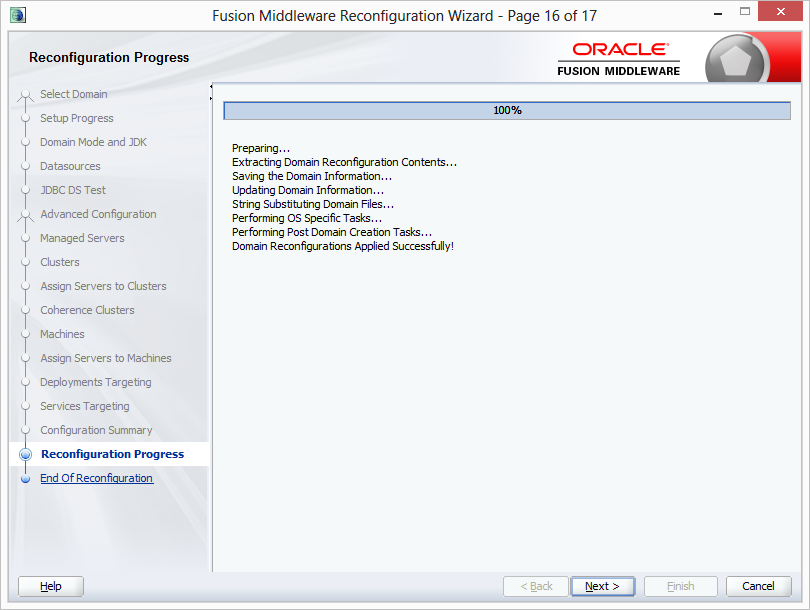
IMPORTANT NOTE: If you press on the “reconfig” button there is no chance to go back again, the only method is start from beginning.
18. Just click on “reconfig” button, then “Oracle WebLogic Server Reconfiguration succeeded”. Existing test_domain updated and upgraded successfully.
19. Exciting moments! Go to the your new WebLogic 12.1.2 domain and start admin server. After the start process, you should see the new WebLogic version as below with 12.1.2.0.0 version, in the admin server start logs.

After the upgrade process we need to do post upgrade issue. You can see the remaining process in the next post which is “WebLogic 12.1.2 Domain Reconfiguration – II“


Information furnished above was VERY useful. It helped me alought thank you
GREAT WORK
Hi Hidayathulla,
It’s great to hear that. Upgrades sometimes painful 🙂